Scheduling Reports
You can schedule standard and custom reports to run at a particular time, date and frequency. Reports generated from a schedule are created by the vFire Core polling service and saved to the database.
Before you start
You must have Reporting and Schedule Admin selected in your Reporting security role.
-
 Display the Reporting window, if it is not already on screen.
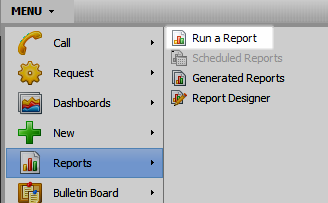
Select Menu and then Reports. From the submenu, select Run a Report
 . Alternatively, select the Reports button on the wrapper if visible, and then Run a Report.
 -
The Explorer pane on the left of the window contains a list of reports, covering both current and historical data, organized into groups. Some reports and groups are orange, indicating that further reports have been created based on the system standard one.
Select the group to expand it if necessary and then select a report to display the details.
-
If you already have a report on screen, you must close it before scheduling a report.
- Select
 from the toolbar. The current schedules are displayed for the selected report. To create a new one, select
  beneath the table.
 - Further fields are displayed for you to complete the scheduling details. They are grouped into different sections. You may need to expand the section to see the fields.
- Scroll up to the top of the window and select the
 button beneath the table of current schedules. The new schedule should appear in the table.
 - Repeat for as many schedules as you wish to add. If you have not entered all the required criteria for the report to be scheduled on the Report Server then you will be prompted for the required entry. Enter the missing information and select Save again.
The new report schedules are displayed beneath the selected report in the Explorer pane, and the original report is shaded orange. If you cannot see them, select the arrow beside the report name.
 - After a report has been generated, it is attached to an email and emailed to the specified recipients. It stays in the system until the Report Expiry time is reached.
| Schedule Details | |||||||||||||
| Schedule Name | The schedule you selected is given by default but you can overwrite it to distinguish between different schedules. | ||||||||||||
| Schedule Start | The start date/time for the schedule. You cannot specify a date/time in the past. |
||||||||||||
| Schedule End | Use the radio buttons to choose whether you want to specify a date, the number of times the report will run or have no end date. If appropriate, specify the date/time or number of reports. | ||||||||||||
| Generate Details | |||||||||||||
| Repeat Interval | Use the drop down list to select Daily, Weekly, Monthly, Yearly or Don’t Repeat. Once you have made your interval choice, there is a range of options to choose the day or date the report is to be run. This field is only active if the Schedule Start and End Dates make it valid. |
||||||||||||
| File Format | Use the drop down list to choose the format of the report file. | ||||||||||||
| Report Details | |||||||||||||
| Reporting Period |
The date range for the data used in the report. The time specified here is the reporting period only, and does not affect the schedule. It will override the period chosen on the Record Selection Parameters section when configuring a report to run. Use the drop down list to select Last to choose a time period before the scheduled run time or Next to choose the time period after the scheduled run time.
or Select the Person Defined radio button and specify from and to dates and times. |
||||||||||||
| Self Service Portal | |||||||||||||
| Display on Self Service Portal | Select this to make the report available to Users on the Self Service portal. The Organization field is displayed next to this option. If enabled, you can use this field to restrict access to the report to Users from a specific organization. If no organization is specified, the report will display on the Self Service Portal in the Global Reports section. Note: The Organization field is only enabled if it is a selected parameter in the Report View window. |
||||||||||||
| Report Expiry | The time after which the generated report is deleted from the system. Enter a number and from the drop-down list choose whether this is the number of days, weeks, months, quarters, or years. | ||||||||||||
| Recipient Details | This is a table of analysts and/or Users who will receive a copy of this report. You must include at least one recipient to schedule the report. Select the Add button  below the table. In the Find Recipients box, find your recipients and then select Add to ensure that they appear in the Selected Recipients list. Then select OK to return to the main window and see the names listed under Recipient Details. below the table. In the Find Recipients box, find your recipients and then select Add to ensure that they appear in the Selected Recipients list. Then select OK to return to the main window and see the names listed under Recipient Details. |
||||||||||||
If the Reporting Service is stopped, any reports that have been scheduled will not be able to run at the scheduled time. However, as soon as the Reporting Service is restarted, any reports that were scheduled to run during the time the service was off will be generated. Furthermore, any of these generated reports for which email recipients were specified will be emailed, provided the Messaging Service is on.
Displaying Scheduled Reports
You can view a list of reports that have been scheduled.
Before you start
You must have Reporting and Schedule Admin selected in your Reporting security role.
- Select
 and then Reports.
 - From the submenu, select Scheduled Reports.
- Use the Schedule Search Criteria pane to search for the report. Most of the fields have Q/D buttons to enter the search values.
Next This allows you search within a given number of hours, days weeks, months or years from the current date/time. Having selected it, enter a number in the text box
From the drop-down list select the unit of time.
Person Defined This allows you to search within a given date/time range. Having selected it, enter From and To dates and times Self Service Portal Report Check to search for reports flagged to display in the Self Service Portal Organization Check to search for reports assigned to an organization Group Check to search for reports created by analysts of a group Schedule Owner Check to search for reports crated by a specific analyst Updated By Check to search for reports updated by a specific analyst - Select
 at the bottom of the pane to start the search. All of the scheduled reports that match the search criteria are displayed in the Scheduled Reports window.
 - From the list of scheduled reports, you can:

|
Open a highlighted schedule/report |

|
Refresh the list |

|
Adjust the column display |

|
Print the list of scheduled reports |

|
Email the owner of a selected schedule |
Deleting a Schedule
You may find that you have created a schedule in error, or that one is no longer in use and you would like to delete it.
You cannot reverse this procedure. If you find that you have deleted the wrong schedule, you will need to recreate it.
Before you start
You must have Reporting and Schedule Admin selected in your Reporting security role.
- Display the list of Scheduled Reports.
- Select a report that is part of the schedule you want to delete. Either double click on it, or select it and then select the Action button on the toolbar.
-
There may be several reports within the same schedule on the list. Simply select any one of them.
- The report details are displayed, with the current schedules listed in the table at the top of the window. Highlight the schedule you want to delete and select
 beneath the table.
 - At the prompt, confirm that you want to delete the schedule. It disappears from the table and the Explorer pane.
Viewing a Scheduled Report
You can view reports that have been generated as a result of a schedule.
Before you start
In order to view reports, you must have Reporting selected in your Reporting security role. If Security is also selected, the relevant report must appear in the Selected Report List in your security role also.
The system administrator account (Admin) does not have access to the Reporting function.
Select Menu and then Reports. From the submenu, select Generated Reports. A list of generated reports is displayed. Select the one you want to view and then select .
Printing a Report
-
Select Menu and then Reports. From the submenu, select Generated Reports. A list of generated reports is displayed. Select the one you want to view and then select
. - Select the Print button .
- You can change the existing layout of a report, if it is required, and then print the report on any printers to which you are connected. You should note that changing the layout of the report from Portrait to Landscape will truncate the data displayed from each side of the report.
Deleting a Report
You cannot reverse this procedure. If you delete a scheduled report by mistake, you have recreate it by creating a new report schedule.
-
Select Menu and then Reports. From the submenu, select Generated Reports. A list of generated reports is displayed. Select the one you want to view and then select
. - Select
 on the toolbar. Confirm the deletion.
Deleting a generated report will not delete the schedule. If necessary, delete the report schedule.